Application form usability features
General information on usability
Editing of input fields
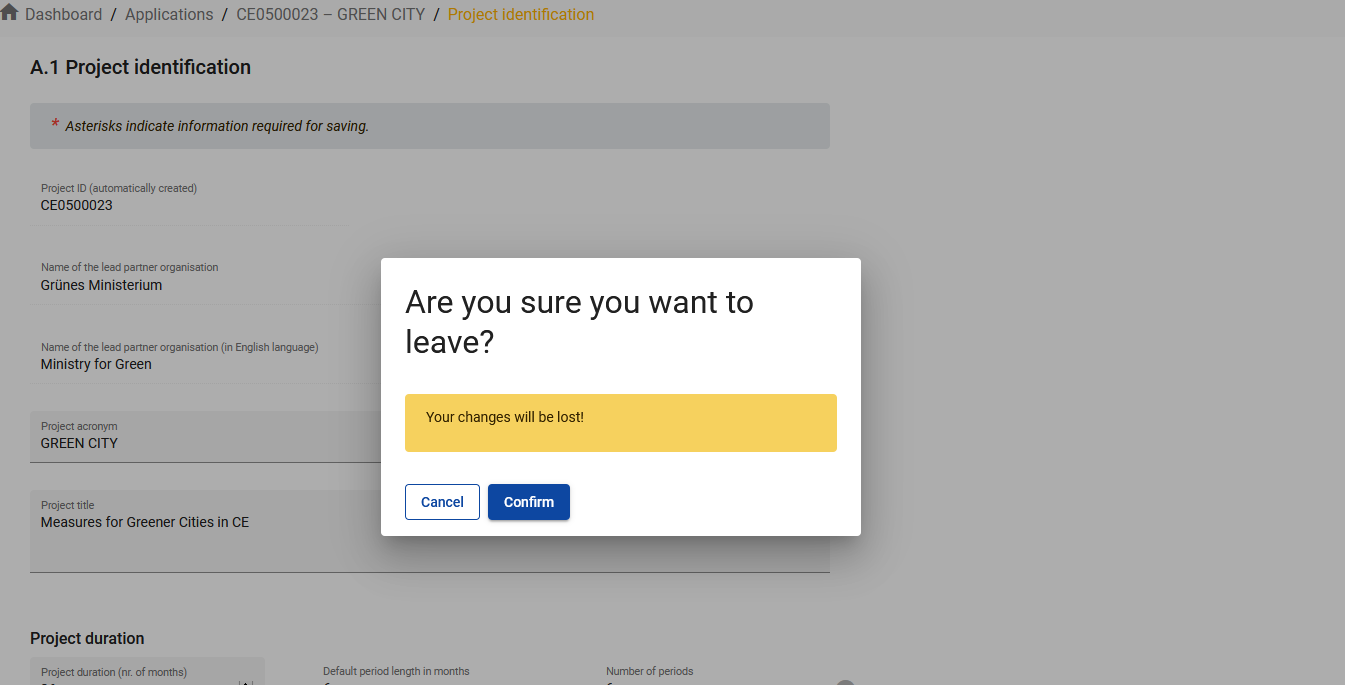
Changes made can be saved or discarded. If the user leaves the page without saving, a warning message is displayed.
Mandatory fields are indicated by an “*” in the system.
A page cannot be saved unless all mandatory fields are filled in.
Once the application is submitted editing of input fields is no longer possible.
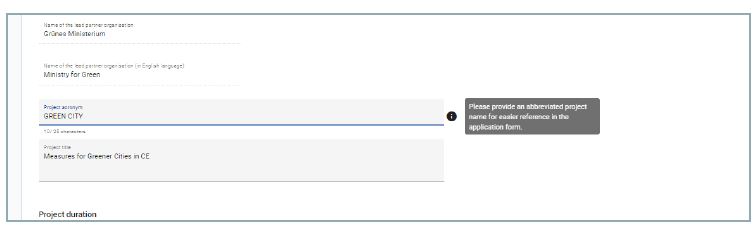
Information icons
Upon hovering over the icon “i” further explanation is provided on what to fill-in the field or how a field is calculated.
Navigation and menu bars
Top menu bar
- Click “Dashboard” to go to the Dashboard section
- Click on person icon to get to the user profile section
- Click “?” to access support information
- Click “English” to select Jems language (only English for Interreg Central Europe)
- Click the person icon to logout from Jems
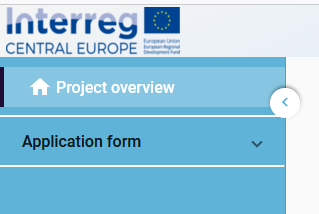
Left menu bar
- To hide/unhide the left menu click the “>”/”<” symbols.
- To fold/unfold application form section the “>”/”<” symbols
- Click on the chapters to navigate through the application form
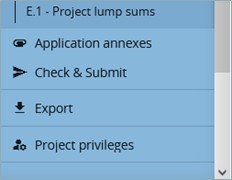
- Click “Application annexes” to access to the file upload section
- Click “Check & Submit” to run pre-submission checks and to submit a project application
- Click “Export” to export the application form as pdf file and the partners budgets as csv file
- Click “Project privileges” to give other users access rights (view/edit/manage) to your project application. For details see the chapter Granting Project Privileges.
Navigation bar (bread crumb bar)
- The navigation bar allows the user to orientate and see the location of the displayed section within Jems starting from Dashboard.
- The displayed section is shown in orange letters and corresponds to the highlighted section in the left menu.
- The user can click on a section in the navigation bar to directly access it. This allows a quick changing to a different section alternatively to the left menu bar.
Application form language
Since the programme language of the Interreg CENTRAL EUROPE Programme is English, the Jems system language selectable in the top menu bar is limited to English.

Number format and rounding in the application form
Budget format settings in the application form:
- inserted as Euro amounts
- numbers and percentages are with two decimals
- comma is used as a decimal separator
Rounding in the application form:
- rounding down to 2 decimals (cut off)
- further calculations are done with rounded amounts (e.g. flat rates on flat rates) This rounding mode is applicable to:
- Calculating totals of budget items
- Flat Rate calculations
- Calculation of funding amounts
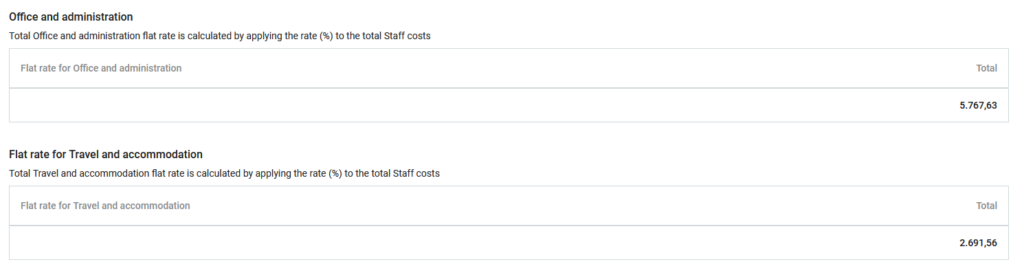
Example: Flat rate for Office and administration calculated in the budget tables

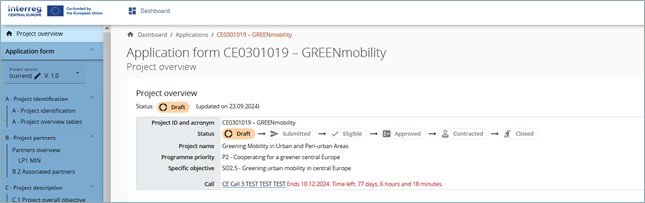
Project overview
General purpose
The project overview contains all details related to application status, application workflow and application attributes.
The call information provides the call name (underlined) as a direct hyperlink to the call information and in red the time remaining for the submission of the application form.
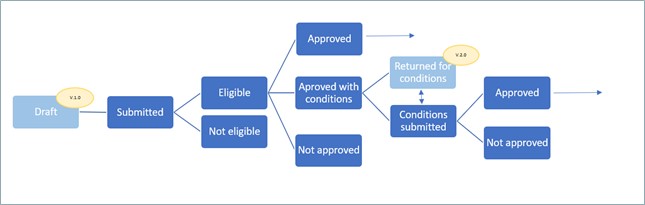
Application statuses
During the application workflow, the application could take one of the statuses mentioned in the diagram below. The status in light blue indicates that the application form is editable.
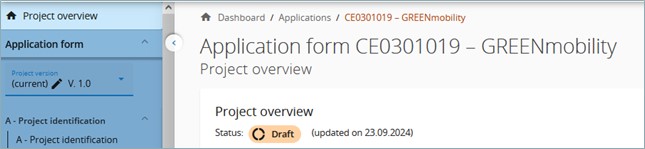
Project version
An application form changes during its life cycle. Versioning allows to access historical “snapshots” of an application form.
Application form versioning is located in the left side menu of application form section. It is represented by a dropdown with version indication.
Every application has a version number. Upon creation the version number is “V. 1.0” (status Draft). The version number remains unchanged after the first submission.
The version counts up when an application is returned to the applicant.
The version number is not linked to the project status
The active version of the application form in dropdown is indicated by “(current)”. When opening the application form the “current“ version is shown by default.
To view a previous version of an application form, select a version in the list of versioned application forms. All inputs and action buttons are disabled in previous versions. On top of every screen appears a yellow message box with information on the version and application form status. “Switch to current version” allows to return to the current version.

A. Project identification
The project identification is split in two sub-sections
- A – Project identification
- A – Project overview tables
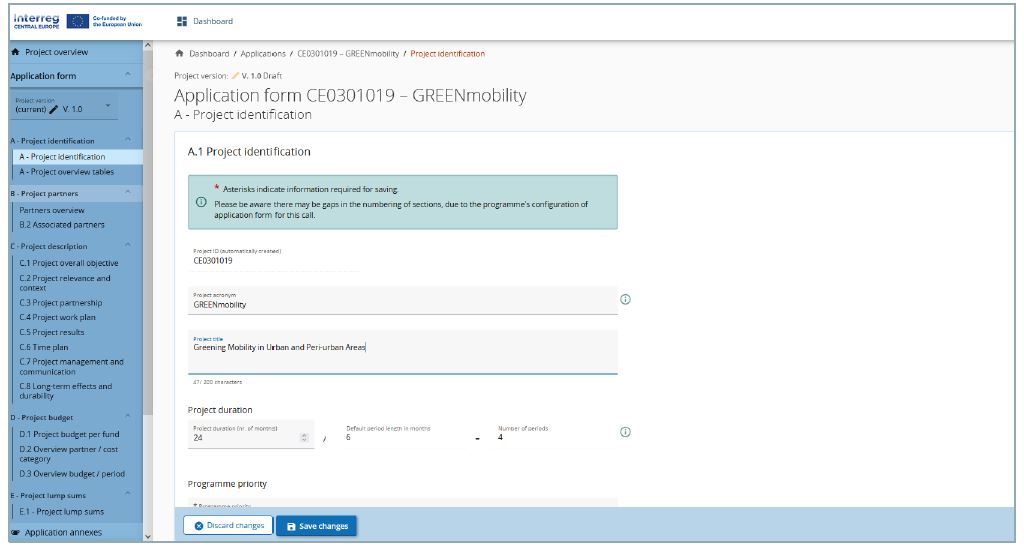
A. Project identification
In the project identification section basic information related to the project needs to be provided.
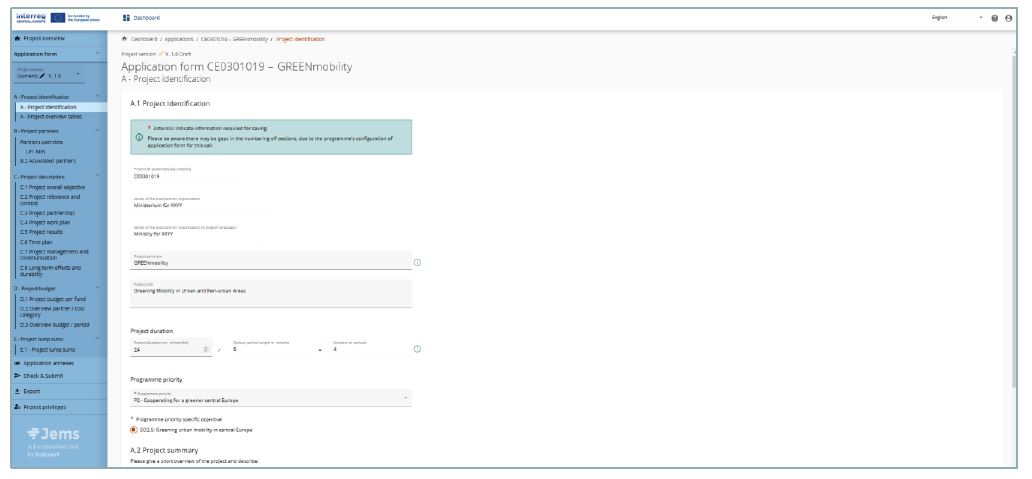
Project id
The Project id is an automatically generated number given by the system. This number is unique per installation and helps the programme to recognise a project. The number is a running number unique per project.
Project acronym* (*mandatory field)
Project acronym is an abbreviation or short name for the project that helps identify the project together with the project id (*mandatory field).
Project title
Text input field for a more explanatory project title.
Project duration
The project duration shall be entered in months and shall indicate the length of the project.
The project duration is also the basis for the calculation of periods in the project and project planning in the rest of the project. The number of periods is calculated as follows: project duration in months divided by the default period length defined by the programme in the call setup.
Project priority* (*mandatory field)
The applicant needs to select the main priority the project contributes to.
Programme priority specific objectives* (*mandatory field)
Once the Project priority is selected, the Programme priority specific objectives appear. The applicant needs to further specify to which specific objective the project contributes.
Project summary
Text input field for providing an overview on the project application by answering the questions in the guidance text.
The section can only be saved, once all mandatory fields (marked with an asterisk * ) are filled in.
A. Project overview tables
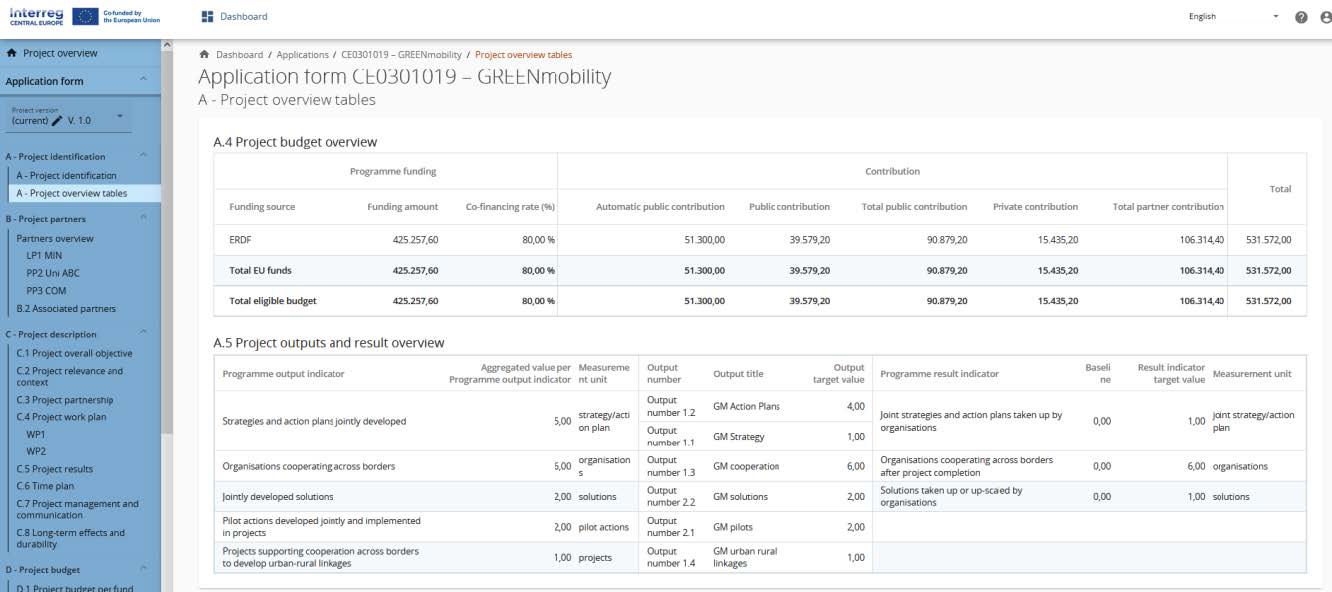
Table A.4. Project budget overview
Table A.4 displays the project budget per fund including the contribution. Its purpose is to provide a clear budget overview in section A. Make sure that the “co-financing” section on project partner level is filled in.
Table A.5. Project outputs and results overview
In the programme setup, programmes can link output indicators to result indicators. This overview table shows the link between output and results in the application form.
B. Project partners
Partners overview
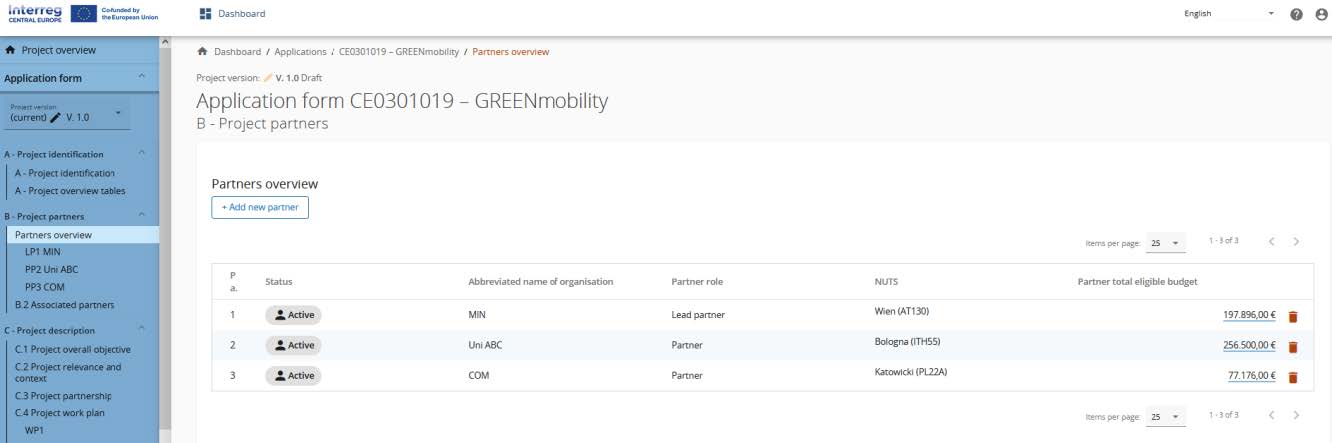
The partners overview provides an overview of all the partners within the project. Essential data is displayed in this overview list
Clicking on the “+ Add new partner” allows for creating a new partner.
Clicking on a specific partner in the lists gives you access to the partner page.
Clicking on the “Partner total eligible budget” (underlined amount) allows you to directly navigate to the partners budget section on the partner page.
Clicking the “Trash” icon allows you to delete the respective partner.
The status “Active” is automatically generated upon creation of a project partner. In case a partner of a contracted project leaves the partnership, this partner can be given the status “In-active”.
For the recommended number of project partners refer to the programme manual and the call specific Terms of Reference (ToR).
B.1 Partner specific section

The section per single partner contains the following sub-sections accessible via tabs:
- Identity
- Address
- Contact
- Motivation
- Budget
- Co-financing
- State aid
Partner identity
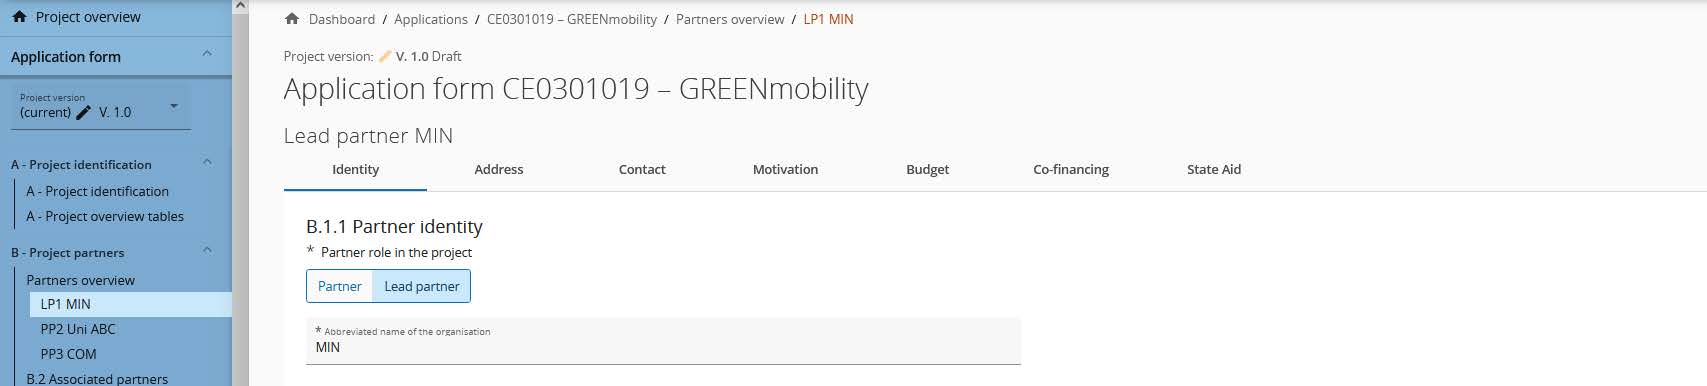
The Partner identity section is used to identify the partner organisation with basic details.
A partner cannot be created without assigning the role, providing the abbreviated name and choosing the legal status (*mandatory fields).
Partner role*
The partner role is either Lead Partner or Partner (*mandatory field).
In case a Lead partner already exists and for a new partner the Lead Partner role is selected, the system will ask the user if the existing Lead Partner role shall be replaced. If yes, the new partner will become the Lead partner and renumbering of the partners will apply. The Lead Partner will always be partner number 1 as long as the Application form is in status “Draft”.
Abbreviated name of the organisation*
The abbreviated name is displayed in the partner overview section (*mandatory field. This name can be used as a reference to the partner using limited characters.
Name of the organisation in the original language
The full name of the organisation in original language needs to be filled in.
Name of the organisation in English
The English name of the partner organisations is used for databases such as KEEP.
Department/unit/division
If applicable, the department/unit/division concerned can be indicated here.
Type of partner
The type of partner is a pre-defined dropdown list of typologies used to categorize the type of partner.
Subtype of partner
The subtype of partner is an additional field relevant for State aid only. The subtype of partner can be selected from a pre-defined dropdown.
Legal status*
A legal status has to be selected (*mandatory field).
Sector of Activity at NACE group level
The sector of activity at NACE group level is an additional field relevant for State aid only. The sector of activity at NACE group level can be selected from a pre-defined dropdown of NACE codes taken from the statistical classification of economic activities NACE Rav. 2 (2008) available via the Eurostat website https://ec.europa.eu/eurostat/ramon/nomenclatures/index.cfm?TargetUrl=LST_NOM_DTL&StrNom=NACE_REV2&StrLanguageCode=EN&IntPcKey=&StrLayoutCode=HIERARCHIC
VAT number
In this field, the partner organisation’s VAT number shall be entered; the overall number has to be one block without spaces or hyphens. The correct VAT format has to be respected; it depends on the country selected in section “Address”. If VAT is not applicable, any other identifier needs to be filled in.
VAT number has to follow standard format per country
- AT: UID number: format ATU+8 characters (e.g. ATU12345678)
- CZ: DIČ number: format CZ + 8-10 digits
- DE: USt-IdNr.: format DE+9 digits (e.g. DE123456789)
- HU: ANUM number: format HU+8 digits (the first 8 digits of the national tax number)
- HR: PDV-ID; OIB number: format HR+11 digits (e.g. HR1234567890)
- IT: P.IVA number: format IT +11 digits
- PL: NIP number: format PL+10 digits
- SK: IČ DPH number: format SK +10 digits
- SI: ID za DDV number: format SI+8 digits
Other identifier number and description
The other identifier number can be used for any identifier other than the VAT number. The description field allows to indicate a reference to the registry, where the other identifier number can be found (e.g. company registry, etc.).
PIC (from EC Participant Register)
This field allows to insert the partner organisation’s 9 digit PIC from the EC Participant Register.
Address
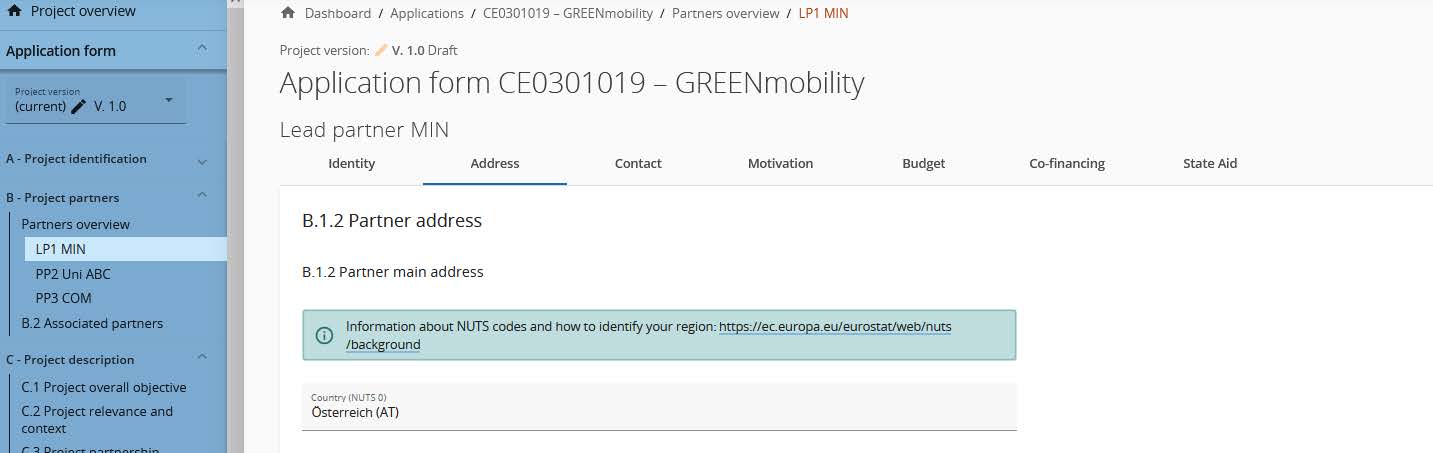
In the Partner address section, the applicant is asked to fill in the partner main address and, if applicable, the address of the department/ unit/division.
- The country selected impacts on the format required for VAT information in section “Identity” (see chapter Identity)
Contact
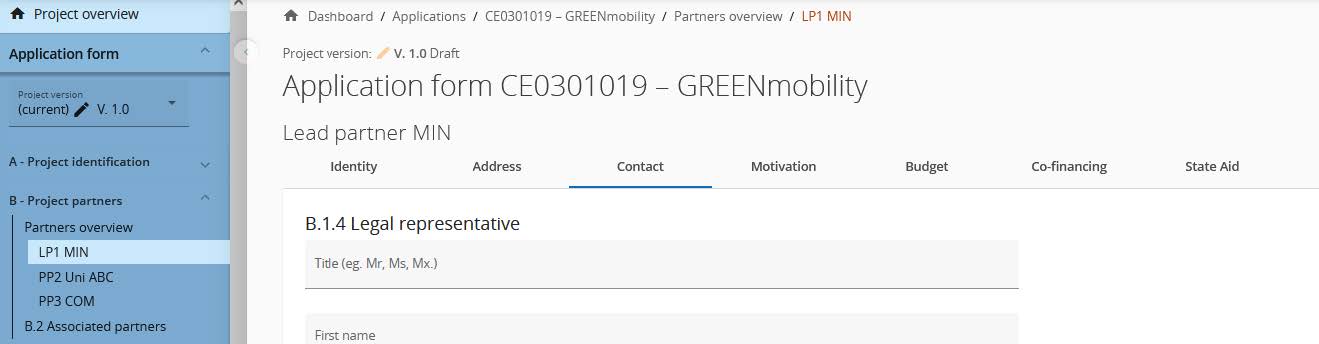
In the Partner contact section information on the legal representative and the contact person are required.
Motivation
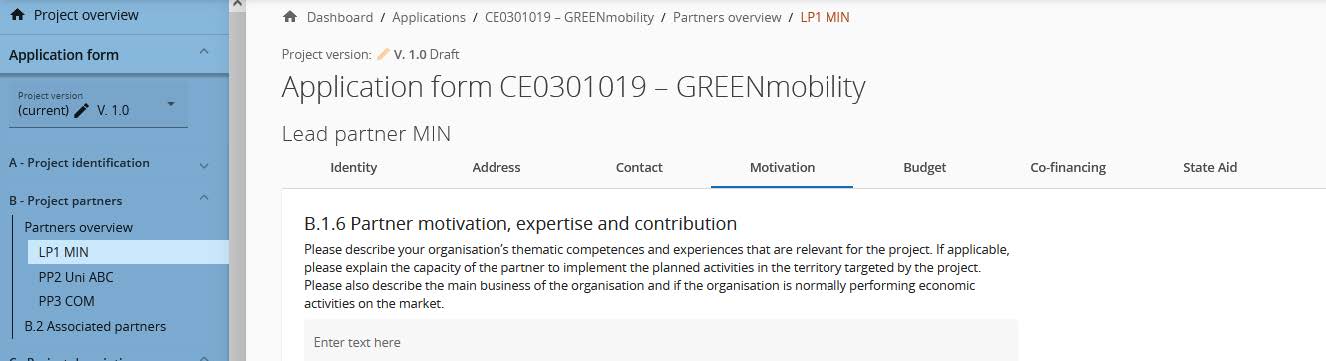
In the Partner motivation section information on motivation for participating in the project and the partner’s role in the project is required.
Budget
In the Partner budget section, the applicant defines the budget for the respective partner. This section consists of:
- Partner budget overview
- Partner budget options
- Partner budget
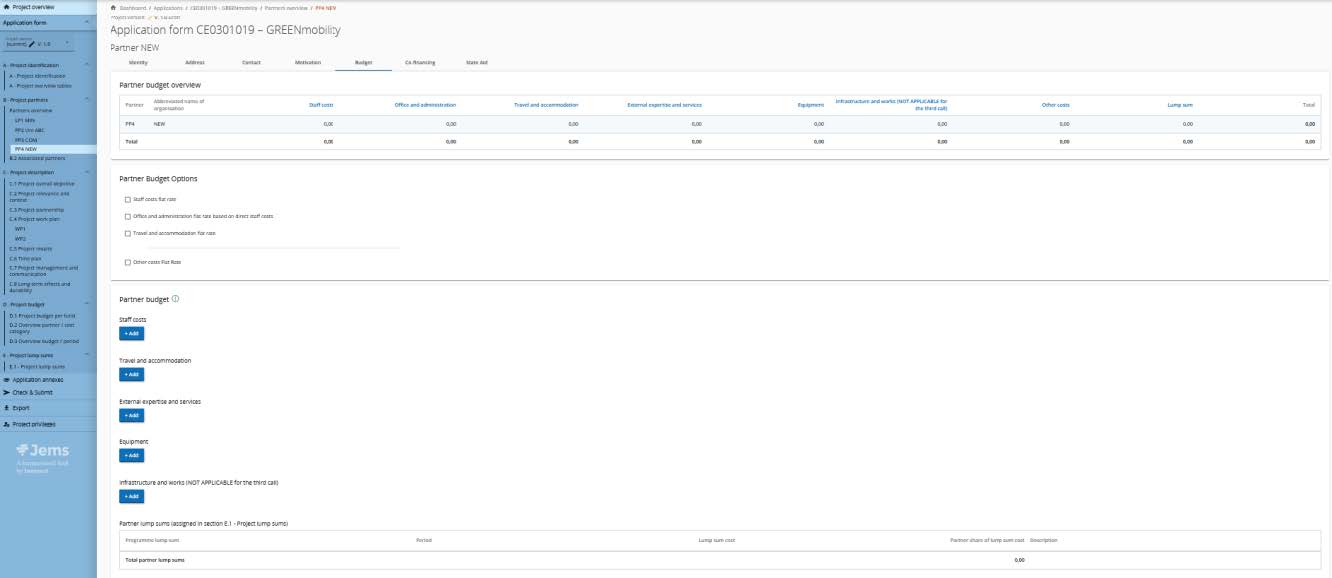
Partner budget overview
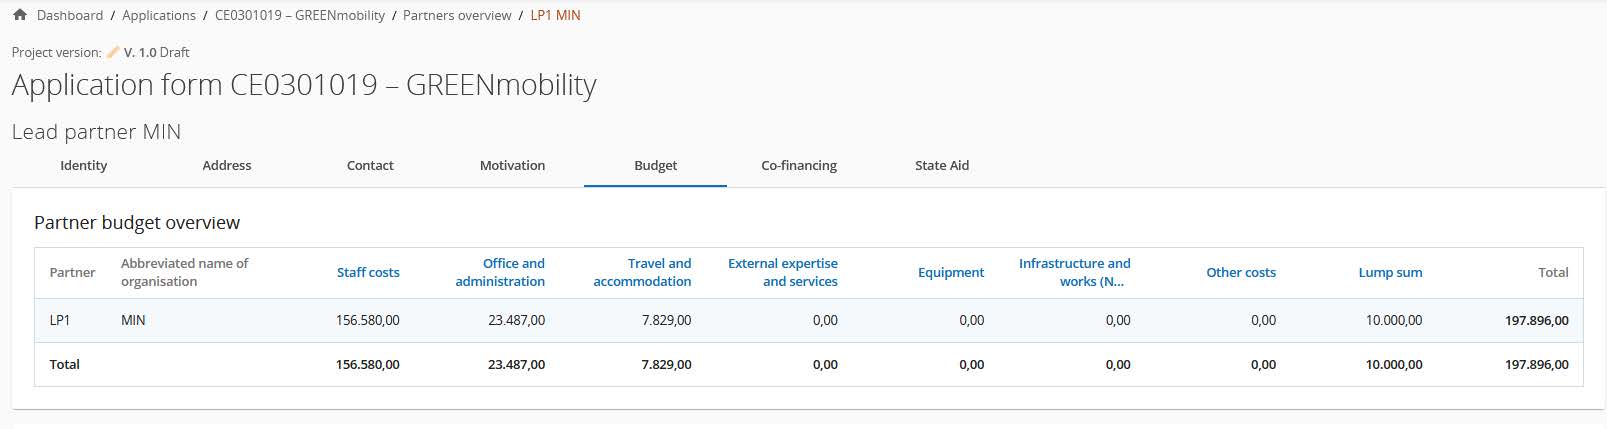
The overview table shows
- the partner budget per cost category
- budget under flat rate “Other costs” (in case this flat rate option is selected in the Partner budget options)
- lump sum for preparation and contracting costs (as entered in section E.1 of the application form)
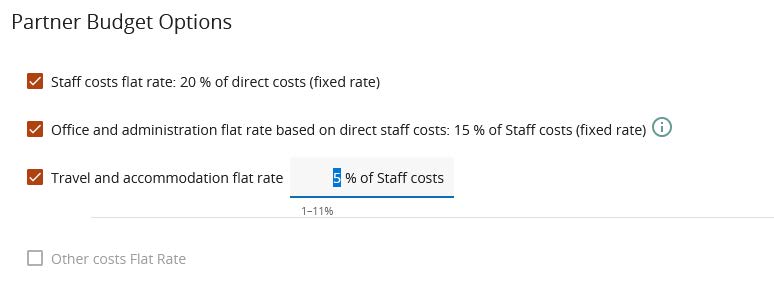
Partner budget options

The budget options allow the applicant to select flat rates. The selected flat rates impact on the Partner budget.
The budget options need to be filled before inserting the Partner budget.
In the third call for proposals, the partner budget can be organised only according either “Option 2” or “Option 3” of the combinations of Simplified Cost Options (SCOs) specified in chapter I.4.2.6 of the programme manual. Detailed information on budget options and flat rates can be found in the programme manual.
Option 2
Option 3
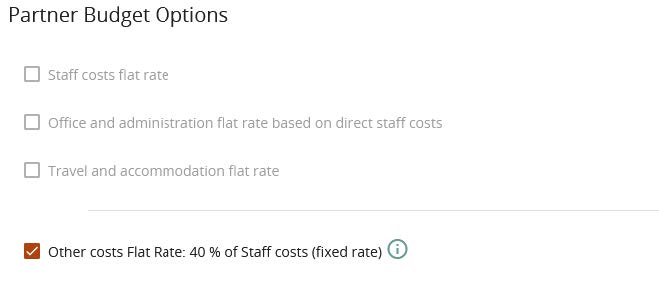
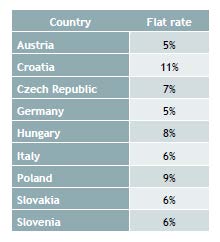
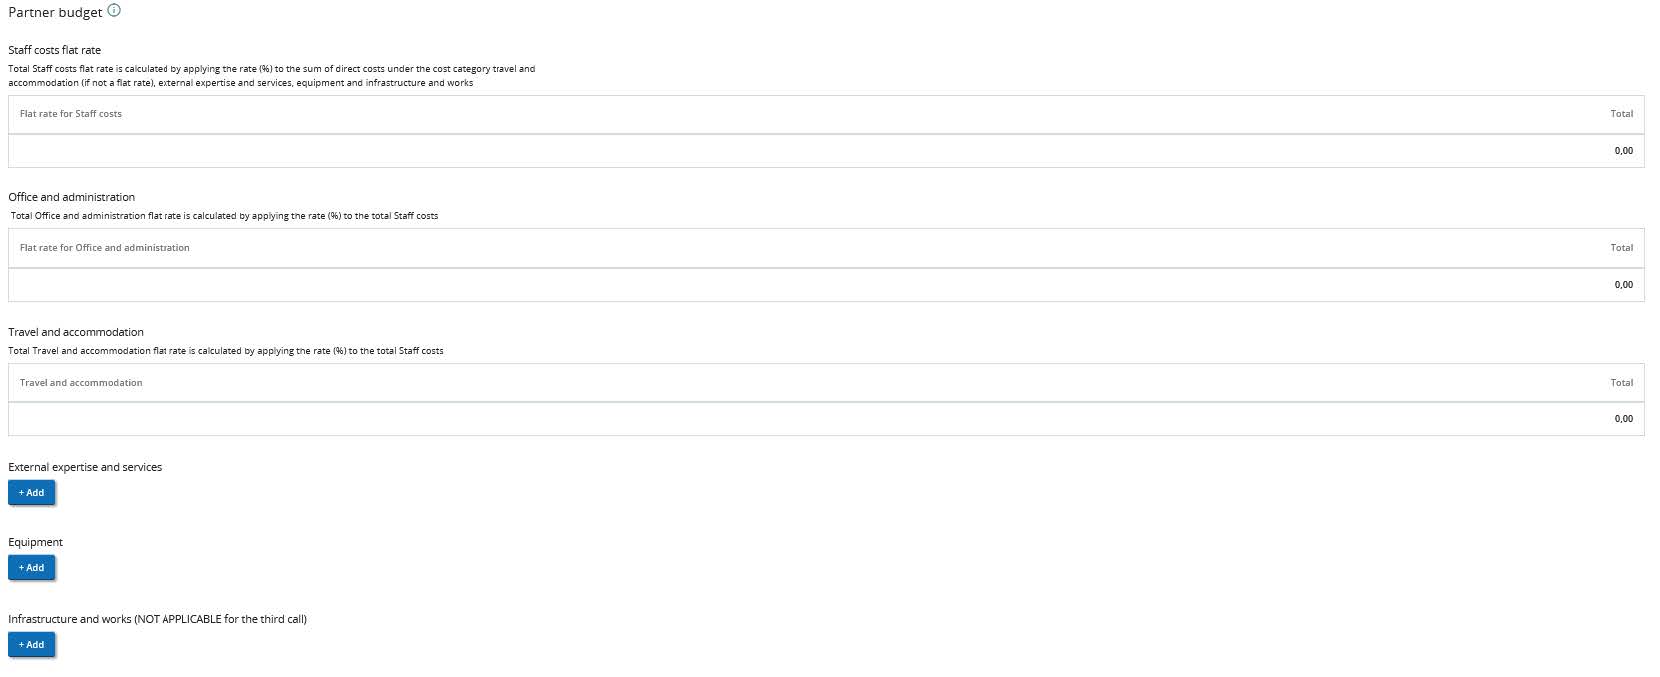
Flat rates are pre-defined except for travel and accommodation.
Travel and accommodation flat rate needs to be inserted by the applicant (according to the rates defined in the programme manual)
Flat rates are added as a separate table to the partner budget and the flat rate amount is automatically calculated based on total costs in another cost category/ies
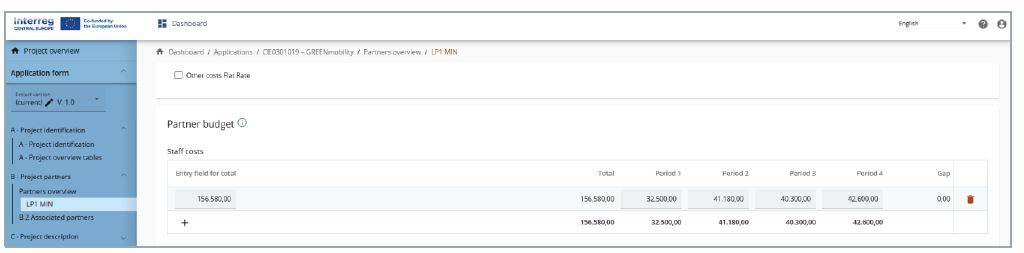
Partner budget
The Partner budget section is the section where the partner budget is filled in under the available cost categories. The Partner budget section consists of 6 cost categories. However, Cost category 6 “Infrastructure and works” is not applicable for the third call.
Make sure that the budget options are set and saved, before inserting the partner budget.
In the third call for proposals, the partner budget can be organised only according either “Option 2” or “Option 3” of the combinations of Simplified Cost Options (SCOs) specified in chapter I.4.2.6 of the programme manual. Detailed information on budget options and flat rates can be found in the programme manual.
The cost category “Infrastructure and works” is not applicable for the third call. Pilot actions might still include small investments below EUR 25.000, with items belonging to the cost category 5 “Equipment”.
The project total budget is limited to EUR 800.000, corresponding to a maximum of EUR 640.000 ERDF budget.
If a flat rate for a cost category is selected in the Partner budget options, automatic calculation applies and manual budget entries for this cost category are not possible.
Make sure you have defined the project duration in section A- Project identification to have “periods” in the budget tables.
For cost categories “office and administration” and “travel and accommodation” no manual entry of budget items is possible, since they are defined as flat rates.
Please be aware that contents of tables might become very wide and eventually very long. Therefore, scrolling might be required to see the full information in the table.


The budget tables can be created and filled in as follows:
Click “+ Add” to create a budget table under a cost category (except for “office and administration” and “travel and accommodation” since flat rate based)
Click “+” button to add a budget item
Click the “trash” icon to delete a budget item
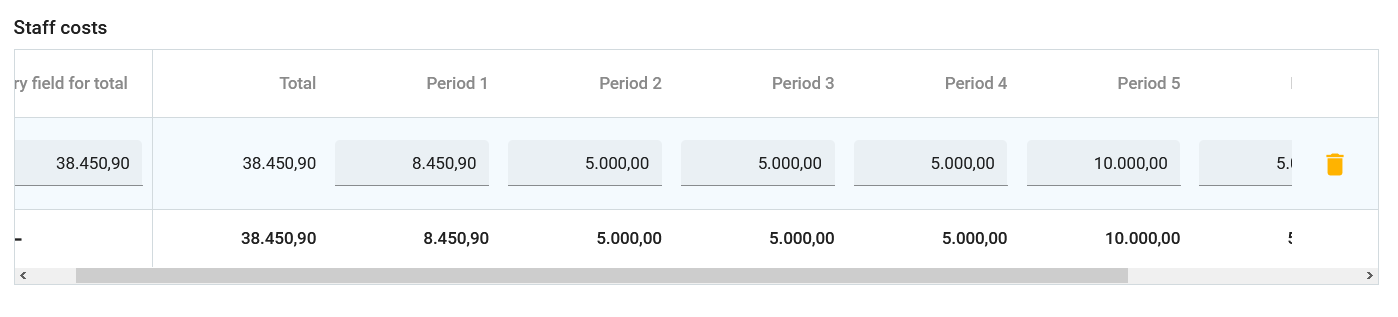
For the budget item, enter the total amount in “Entry field for total”. The entered amount automatically appears under “Total” and needs to match with the sum of the amounts entered per period.
Depending on the number of periods defined in section A project identification, you need to split the Total of a budget item to periods.
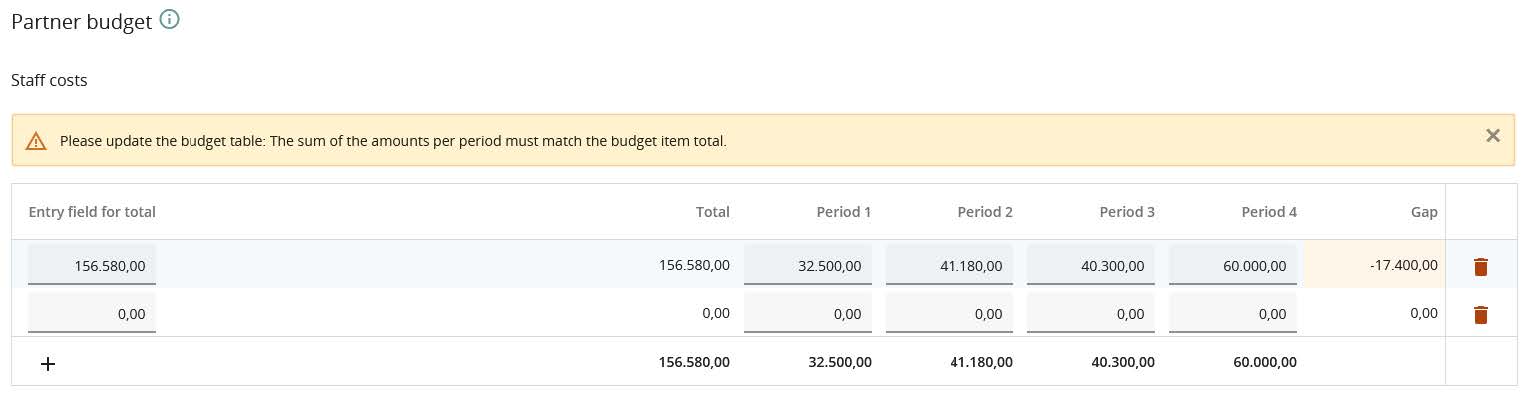
The “Gap” shows the difference between the sum of amounts per periods and the Total amount.
Alternatively, you can enter the amounts per period first and then add the Total in the “Entry field for total”.
To see all periods or the Gap calculator you might need to scroll the table.
The Total amount of one budget item should always match the sum of amounts per periods. In case of mismatch a warning message highlighted in yellow appears.
For cost categories “external expertise and services” and “equipment” a description text needs to be added for each budget item.
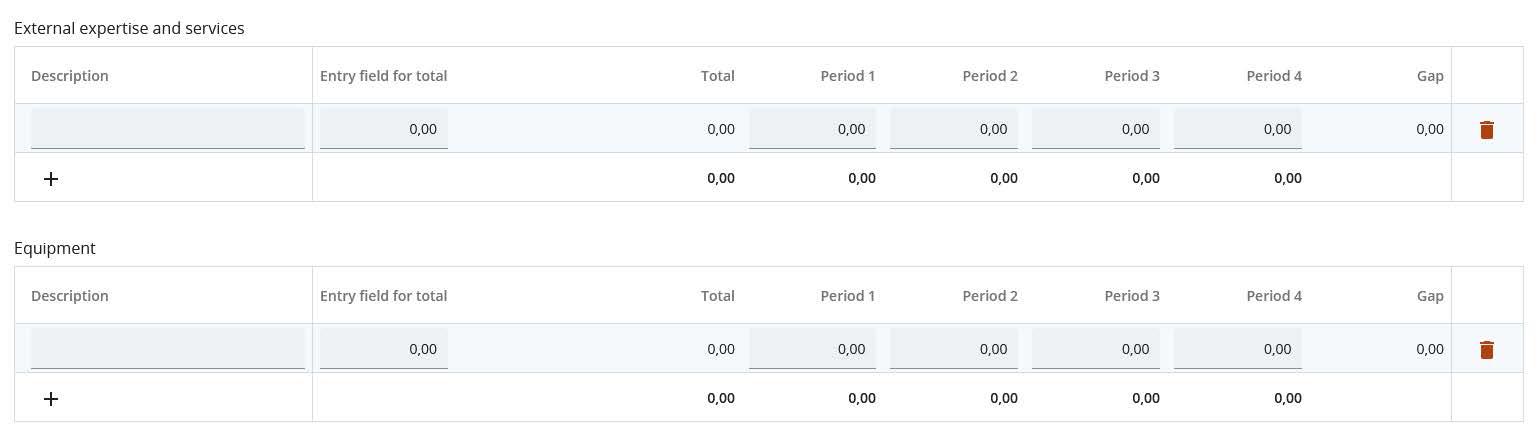
The total budget under a cost category is calculated as the sum of the totals of all budget items entered in the table.
An overview table on the Partners lump sums as entered in Section E.1 is available at the end of the Partner budget section.

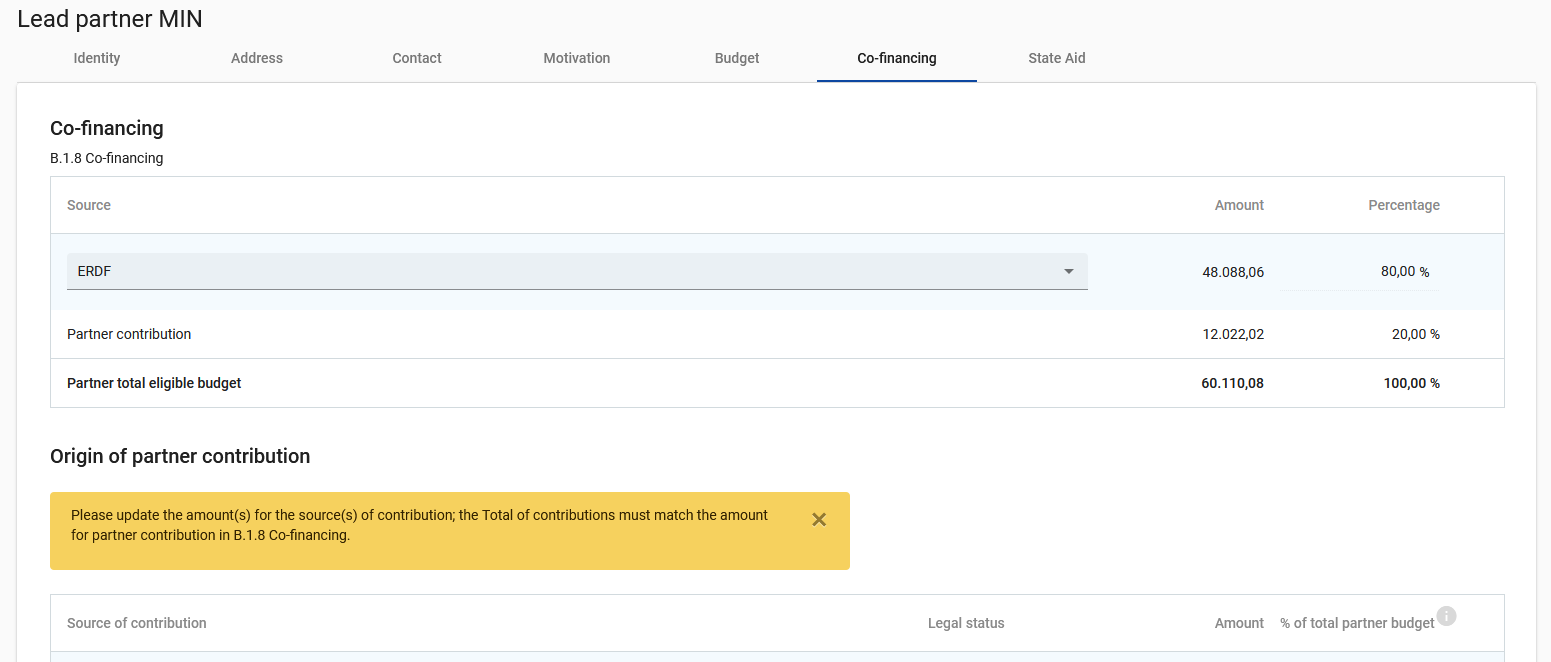
Co-financing
The Co-financing sub-section consists of two tables:
- Co-financing
- Origin of partner contribution
The basis for the co-financing is the partner total eligible budget.
If this section is filled in and the budget is updated, this section needs also to be updated. If not, a yellow warning message appears.
Co-financing
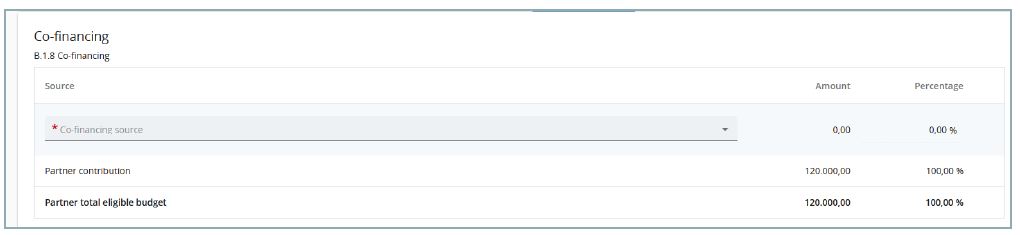
The basis for the co-financing is the partner total eligible budget.
The “Co-financing source*” is a mandatory field (*) and needs to be selected through a dropdown list. For Interreg Central Europe programme only “ERDF” is applicable as funding source.
The rest of the table is automatically calculated, being the remaining budget and percentage of the Partner contribution.
Origin of partner contribution
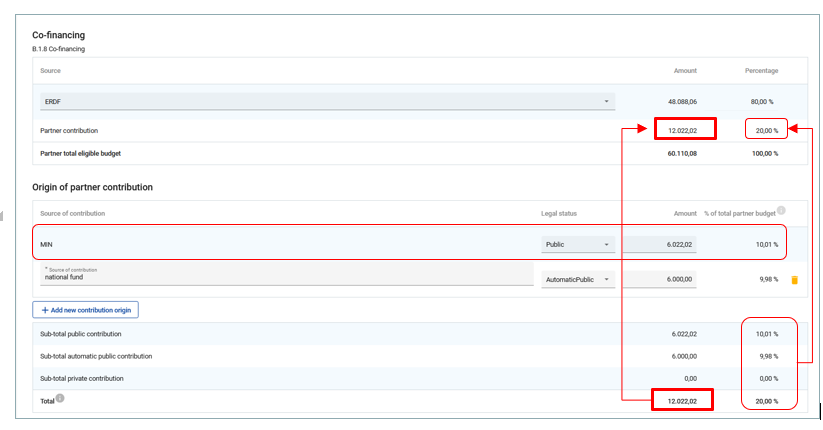
In this part, the applicant needs to define where the partner’s own and external contributions come from.
This table uses the total of partner contribution as total.
The first row is always the partner’s own contribution (the partner name is prefilled).
The legal status of contribution needs to be identical with the legal status selected in Partner sub-section “Identity”.
By clicking the button “+add new contribution origin” the applicant user can add additional sources of contribution.
For additional sources of contribution, the applicant needs to define the legal status of the contribution (“public”, “automatic public” or “private”) and insert the amount. The percentages are automatically calculated and also the subtotals and total partner contribution is automatically calculated.
Detailed information additional sources of partner contribution can be found in the programme manual.
The funding amounts are always rounded down. The difference between the total eligible budget and the funding amounts is allocated to partner contributions. Therefore, the total partner contribution is basically rounded up.
In case of mismatch of the Total in “Origin of partner contribution” with the partner contribution in “Co-financing” and Error message in red appears indicating the difference. Information cannot be saved as long as the mismatch persists.

State aid
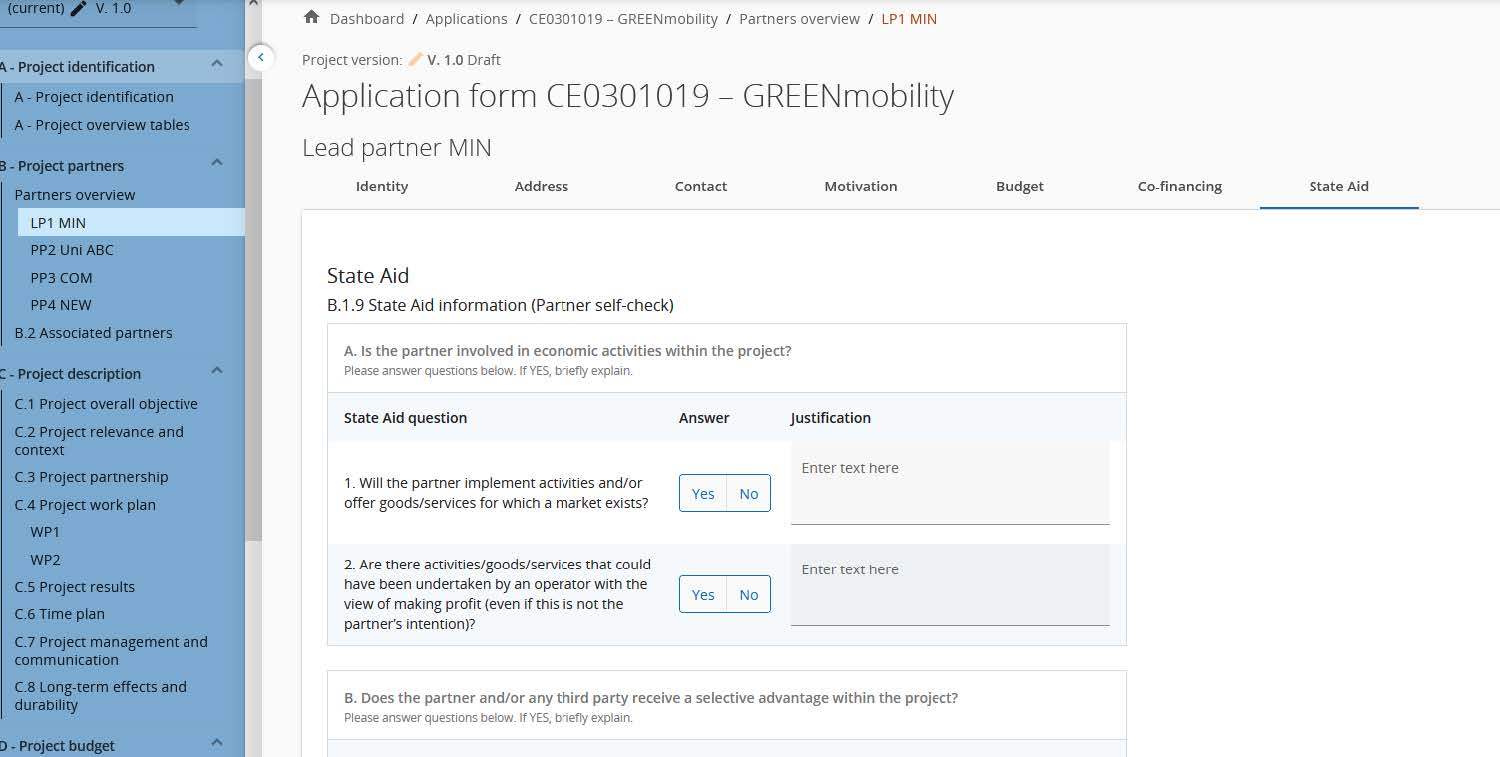
The “State aid criteria information” contains four mandatory questions.
In case the selected answer is “YES” the justification text field needs to be filled in.
“State aid relevant activities” allows to indicate, which of the activities created in the work plan are State aid relevant for this partner.

If an activity is deleted from the work plan, the activity is automatically deleted from the State aid relevant activities in the State aid partner page.
Information on the “State aid regime” is organised as selection from a drop-down menu. It shall be filled in only after project selection.
B.2 Associated partners
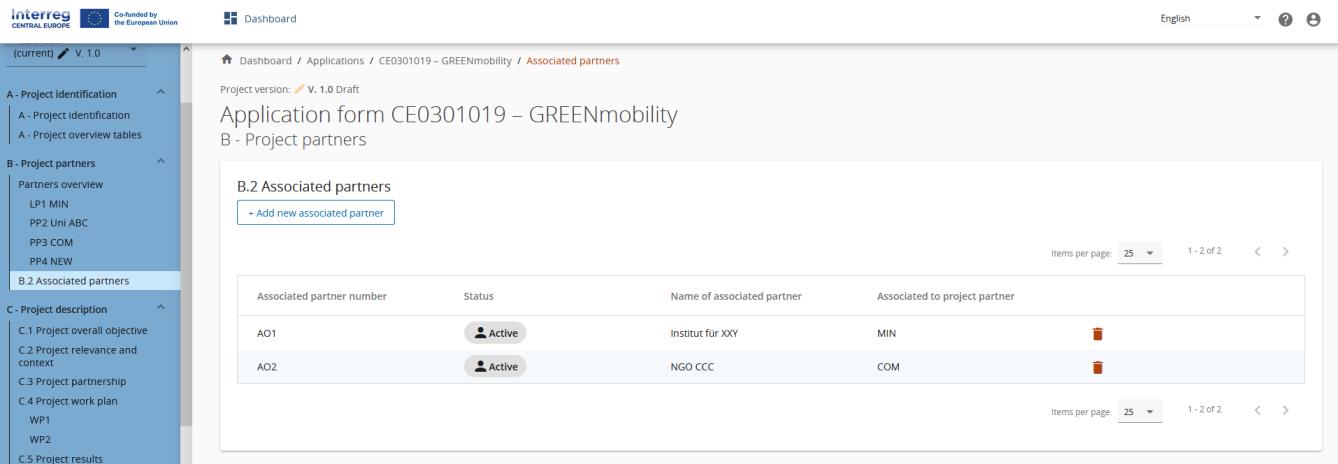
The associated partner section consists of an overview like the Partner overview and is similarly organised.
Click “+Add new associated partner” to create a new associated partner.
Click on the “trash” icon to delete an associated partner.
Name of the organisation in original language has to be filled in (*mandatory).
Partner to which the organisation is associated to has to be filled in (*mandatory).
The status “Active” is automatically generated upon creation of the associated partner. In case an associated partner of a contracted project leaves the partnership, this partner can be given the status “In-active”.
All fields marked with “*mandatory” have to be filled in, otherwise information cannot be saved.
Associated organisations do not have a budget and are always linked to an existing partner in the project.
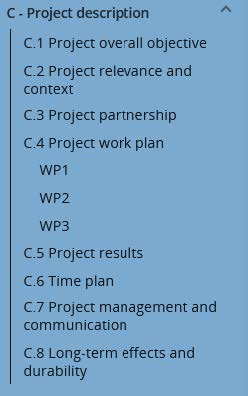
C. Project description
Section C is structured in 8 sub-sections C1.-C8.
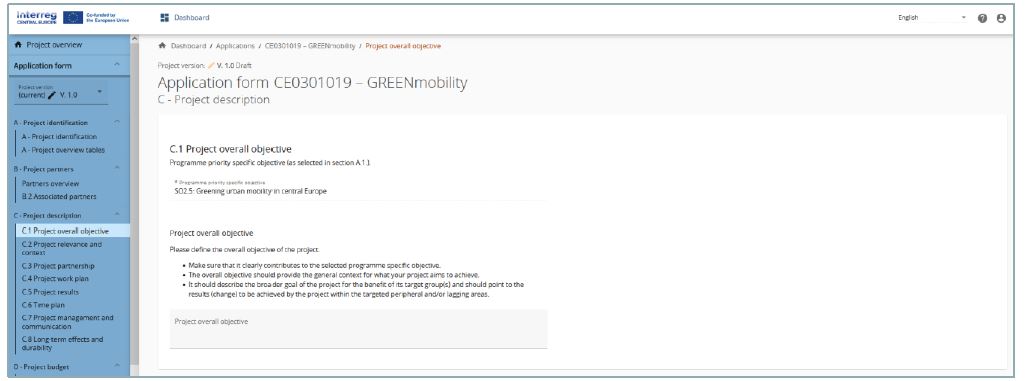
C.1 Project overall objective
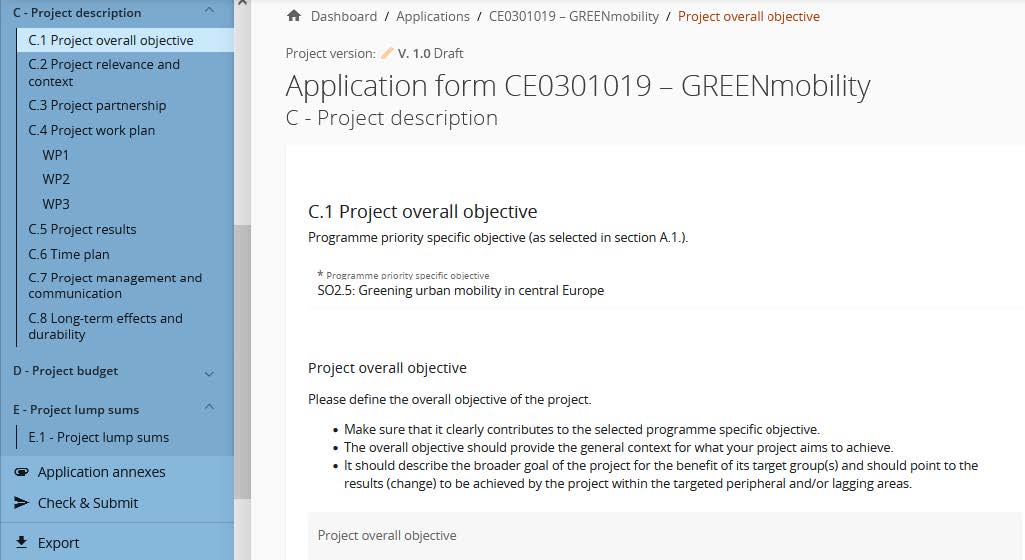
The Programme priority specific objective as chosen in Section A1 is shown.
Text input fields to describe the Project overall objective.
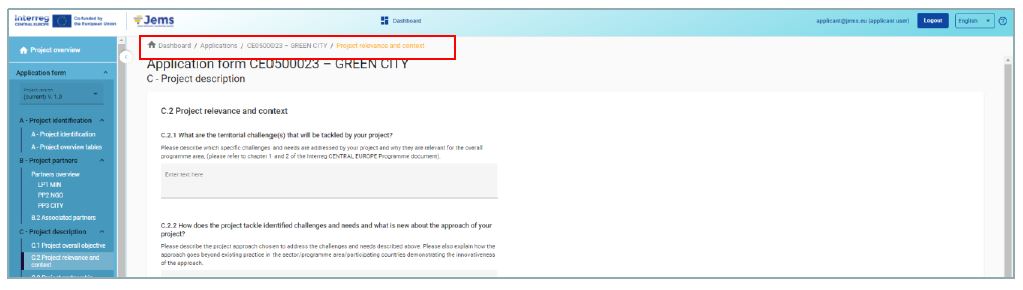
C.2 Project relevance and context
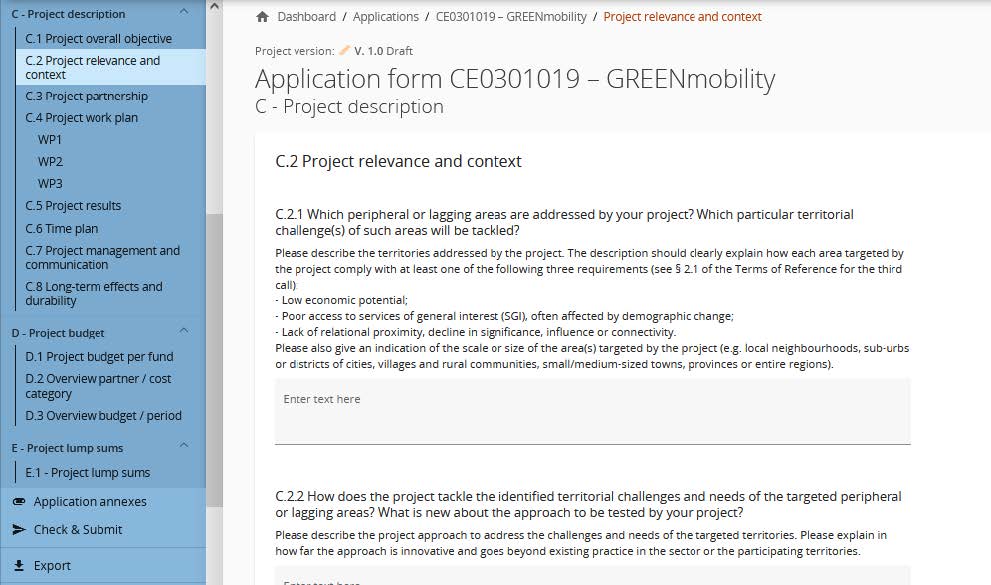
Mandatory fields are marked with “*”.
Sections C2.4, C2.5 and C2.6 are list inputs
- Click “+” to add an item
- Click the “trash” icon to remove an item
C.3 Project partnership
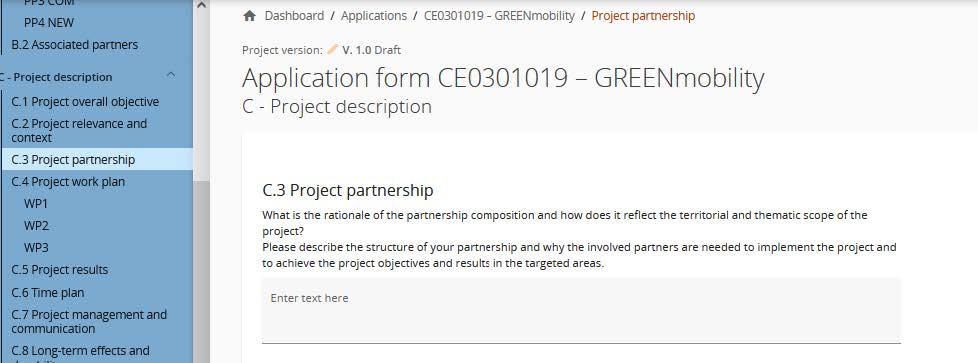
Text input fields to describe the Project partnership.
C.4 Project work plan
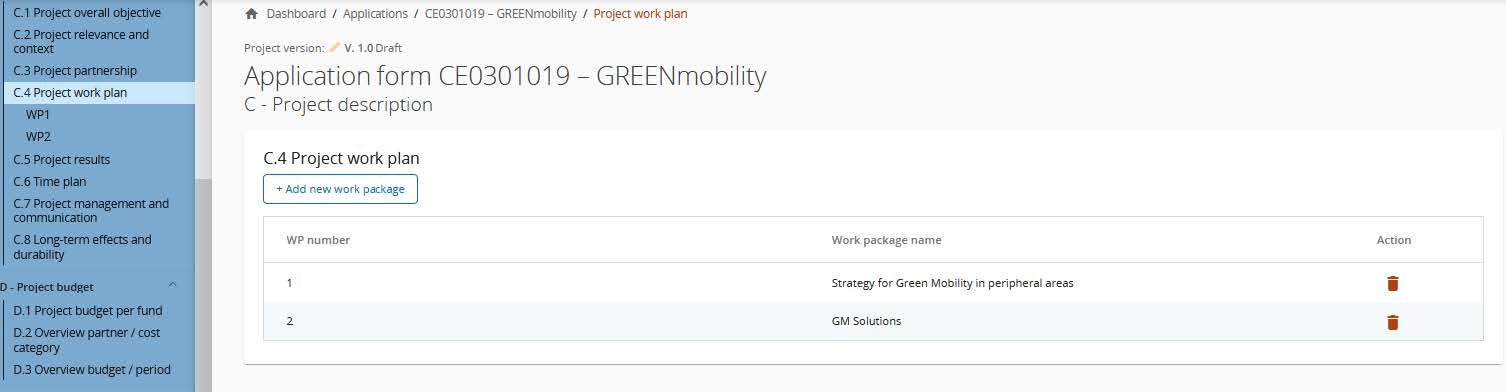
The Project work plan overview lists the work packages (WPs) in the project.
Click “Add new work package” to create a new WP.
WPs are numbered automatically.
Be aware that the maximum number of WPs is 2. Even if you technically can create more WPs, the pre-submission checks will provide an Error message, if more than 2 WPs exist.
Click the “trash” icon to delete a WP.
By clicking on a work package in the list, the details page of the selected work package opens.
Each WP is structured in the following section accessible via tabs:
- Objectives
- Activities
- Outputs
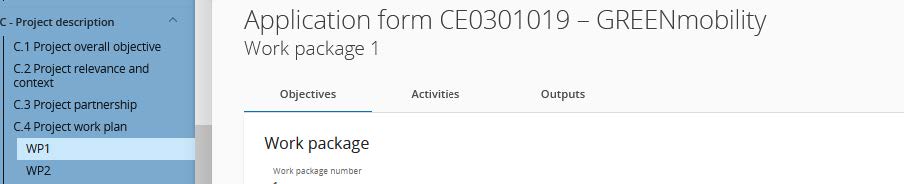
Objectives
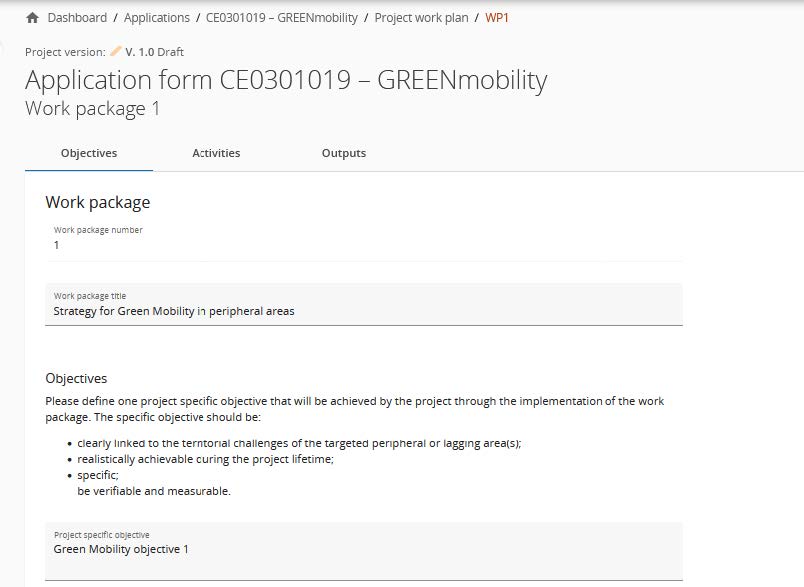
Work packages are numbered automatically.
Text input fields to describe the work package title and project and communication objectives.
Activities
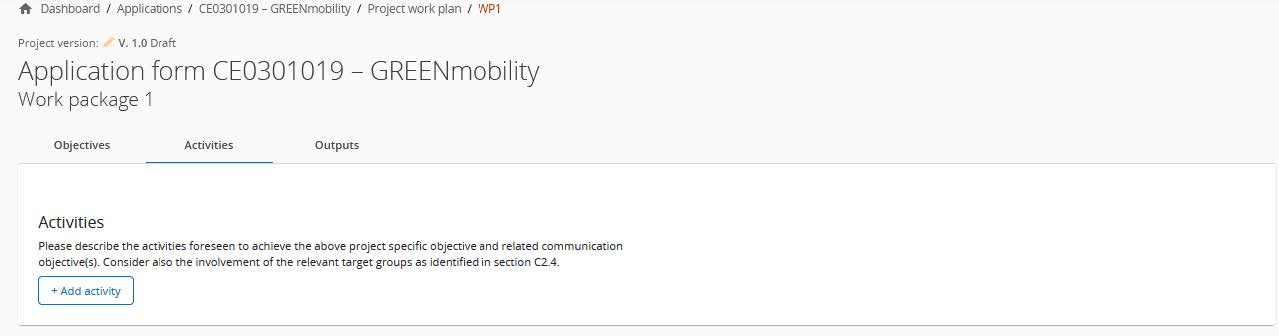
In this part, activities can be created within a specific work package.
Click “Add activity” to create a new activity (usually not more than 4 to 6 activities should be foreseen per work package).
Click the “trash” icon to delete an activity.
Activities are automatically numbered.
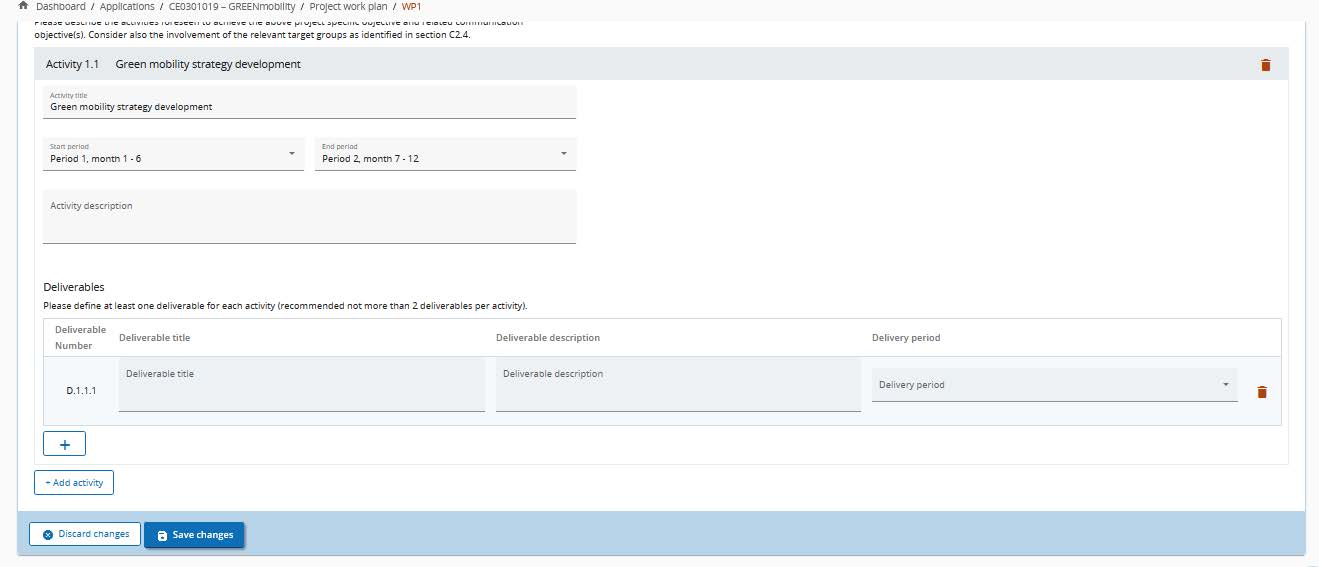
For each activity one or more deliverables can be created (recommendation to include not more than 2 deliverables per activity).
Click “+” to create a new deliverable.
Click the “trash” icon to delete a deliverable.
Deliverables are automatically numbered.
Activities are linked to the Project partner State Aid section. If an activity is deleted from the work plan, the activity is automatically deleted from the State aid relevant activities in the State aid partner page.
Outputs

In this part, outputs can be created within a specific work package.
Click “Add output” to create a new output.
Click the “trash” icon to delete an output.
Outputs are automatically numbered.
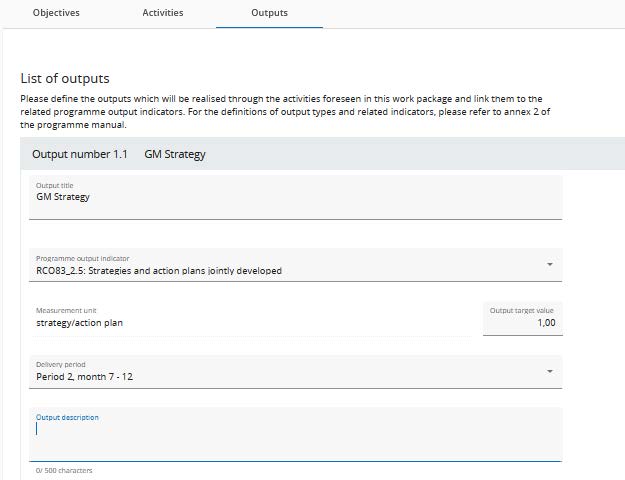
Besides normal input fields, a Programme Output Indicator has to be selected for each output.
Once the Programme Output Indicator is chosen by the user, the measurement unit is automatically filled in.
The Target value is by default 1 and can be increased by the user.
The user can only choose Programme Output Indicators linked to the Programme Specific Objective selected in section A- Project Identification.
This section can only be completed, if in section A- Project Identification the following fields are filled
- Project duration (to be able to select the delivery period)
- The Programme Priority Specific objective (to be able to select indicators)
C.5 Project results

The applicant can add Project Results to a list in this section.
Click “Add result” to create a new result.
Click the “trash” icon to delete a result.
Results are automatically numbered.
A Programme Result Indicator has to be selected for each Result.
Once the Programme Result Indicator is chosen by the user, the measurement unit and baseline are automatically filled in.
The Target value is by default 1,00 and can be increased by the user.
The user can only choose Programme Result Indicators linked to the Programme Specific Objective selected in section A- Project Identification.
This section can only be completed, if in section A- Project Identification the following fields are filled
- Project duration (to be able to select the delivery period)
- The Programme Priority Specific objective (to be able to select indicators)
C.6 Project time plan
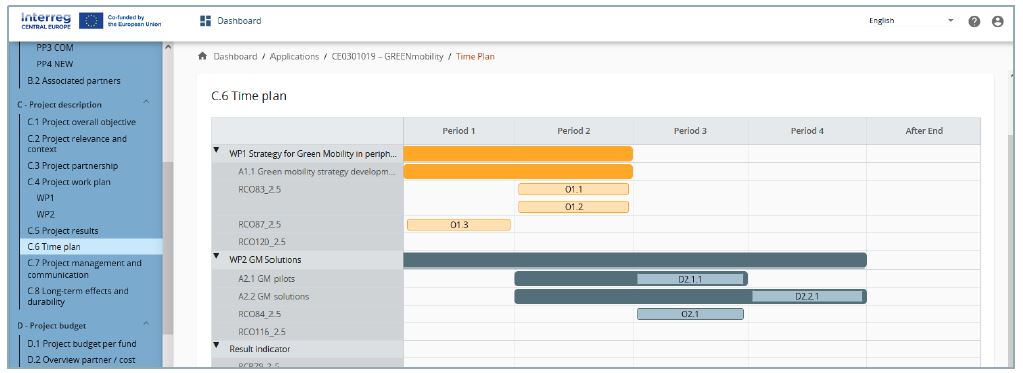
The project time plan is automatically generated using data from the Application form.
Hovering over deliverables, outputs and results display the target values.
Project duration (Section A1) has to be filled in and periods have to be defined for each item in order to be displayed on the time line accordingly.
C.7 Project management
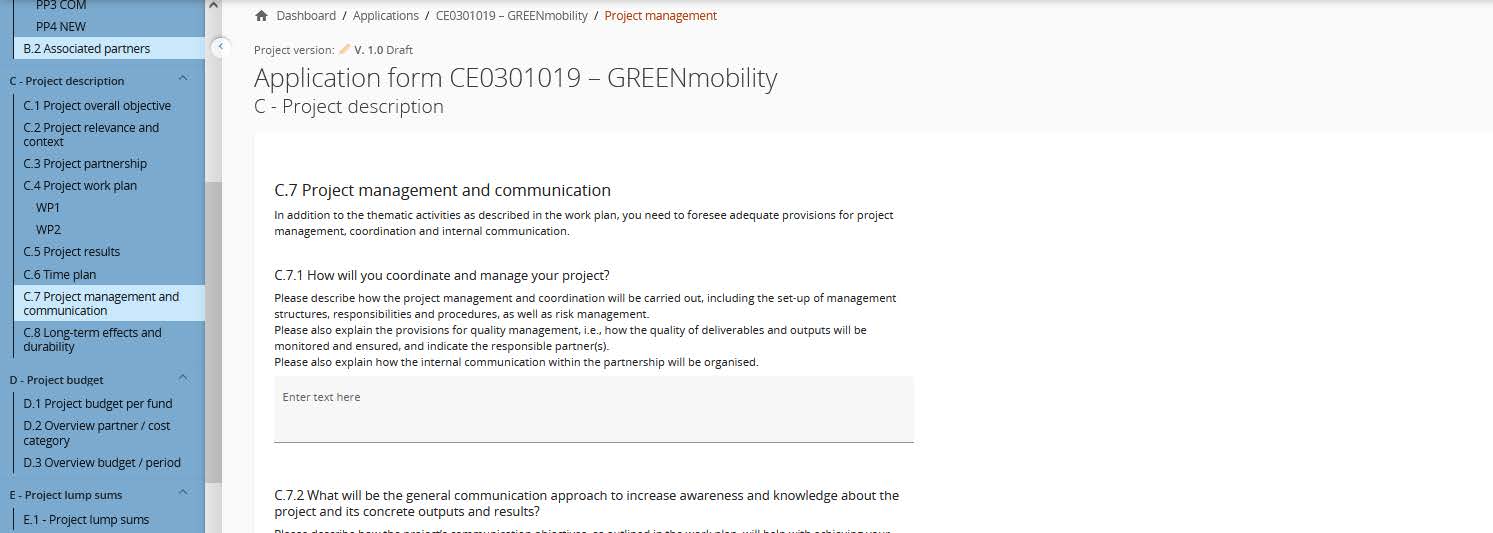
This sub-section consists of text inputs fields and tick boxes to select cooperation criteria.
Part of the text input fields are not applicable (N/A) for the third call and should be left empty.
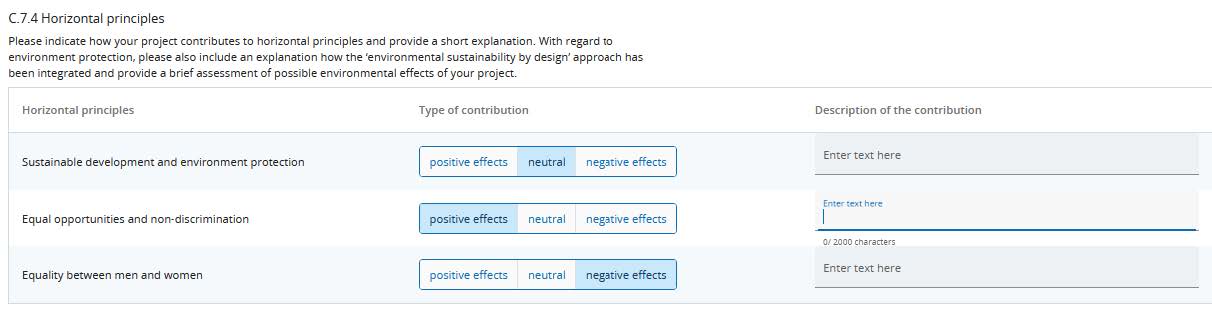
In C.7.4 Horizontal principles the user needs to select the type of contribution by clicking the toggle button with the applicable option.
C.8 Long-term plans
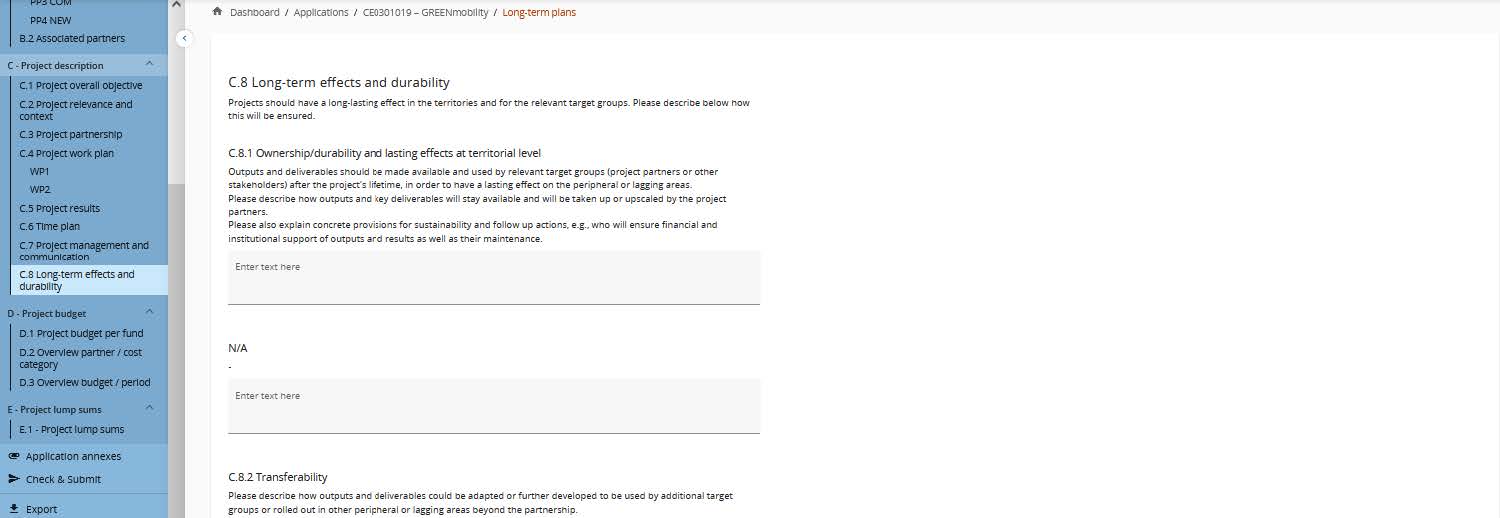
This sub-section consists of text input fields to be completed by the user.
Part of the text input fields are not applicable (N/A) for the third call and should be left empty.
D. Project budget
In section D the following project budget overview tables are available
- D.1 Project budget per fund
- D.2 Overview partner / cost category
- D.3 Overview budget / period
D.1 Project budget per fund
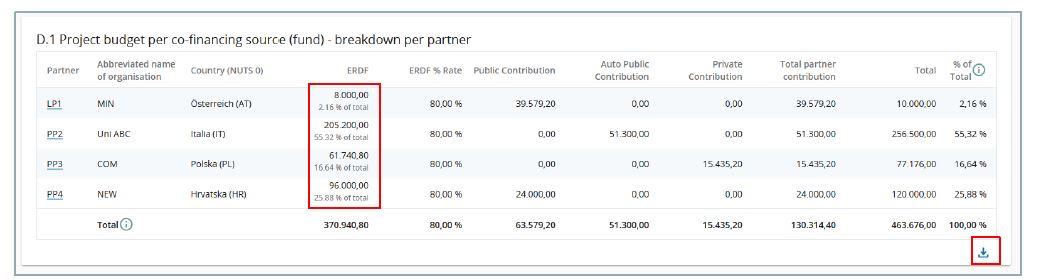
Project budget per fund is an automatically generated table based on the co-financing section of each partner.
The percentage of ERDF per partner is indicated below the ERDF amount per partner.
To have correct data in the overview table, make sure that the budget and co-financing details are fully and correctly filled in and that the country information is provided in the project partner section. The project lump sums section (E.1) has to also be filled in. Make use of the pre-submission checks to verify.
Click the arrow in the bottom right corner to export the overview table as an Excel file.
D.2 Overview partner / cost category
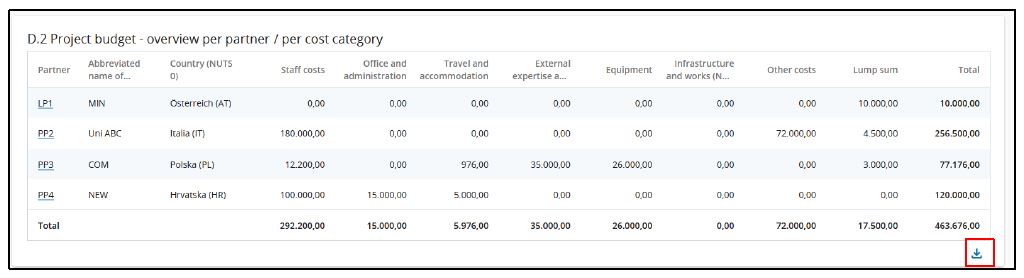
Table D2 provides an automatically calculated overview of total partner budget divided per cost category.
This table shows next to the six cost categories Staff cost, Office and Administration, Travel and accommodation, External expertise and services, Equipment and Infrastructure and works as well as the budget under categories covering multiple cost categories, namely flat rate for Other costs and lump sums.
To have correct data in the overview table, make sure that the budget and co-financing details are fully and correctly filled in and that the country information is provided in the project partner section. The project lump sums section (E.1) has to also be filled in. Make use of the pre-submission checks to verify.
Click the arrow in the bottom right corner to export the overview table as an Excel file.
D.3 Overview budget /period
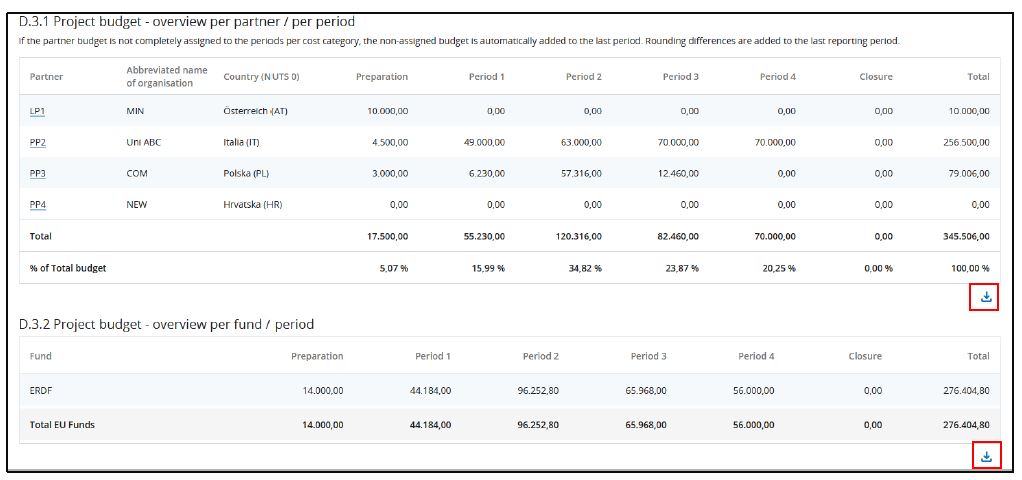
Table D.3.1 provides an automatically calculated overview of total partner budget divided per period.
Table D.3.2 provides an automatically calculated overview of EU funds per period. Since Interreg Central Europe only uses the ERDF fund, the amounts correspond to ERDF only.
To ensure correct data in the overview table, make use of the pre-submission checks to verify whether the budget information is correctly filled in.
Click the arrow in the bottom right corner to export the overview table as an Excel file.
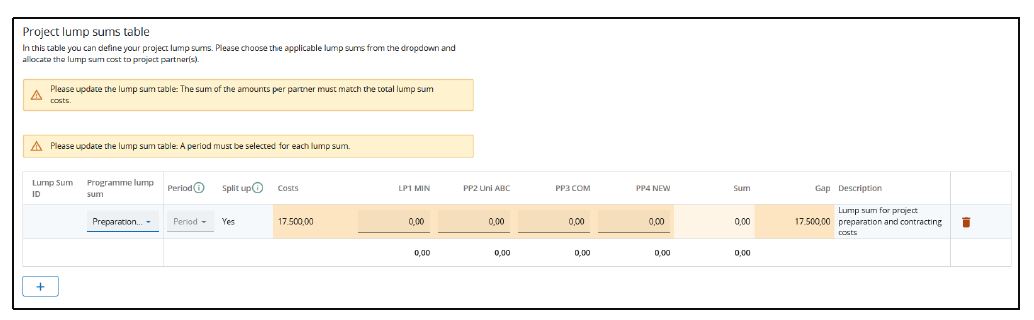
E. Project lump sums
The Project lump sum section is the place where the user can select project lump for preparation and contracting costs.
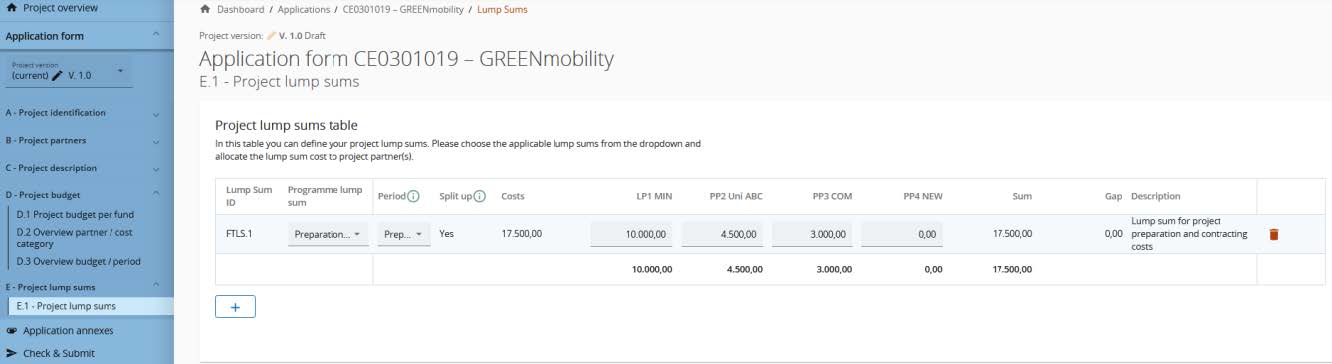
The lump sums can be chosen from the dropdown list and settings predefined by the programme are automatically prefilled.
The user needs to allocate the preparation and contracting costs lump sum to period “Preparation”.
The lump sum can be allocated to one or more partners.
The lump sum for preparation and contracting costs can be selected only once per project. This is checked by a pre-submission check.
The last column of the tables shows the total lump sum amount per partner. This amount is added to the partner total budget.
An Error message appears in case no period is selected.
An Error message appears in case the lump sum amount is not correctly allocated to the partner(s).